Database Contact
By Alex Schendel
Note: This will not teach you to create a database. This is a tutorial is solely for the purpose of communicating with the database.
Introduction
Have you used an app that actually loads its own data over the internet? How did it get there? Well they loaded data from their server. This tutorial will teach you a very basic form of communicating with a database.
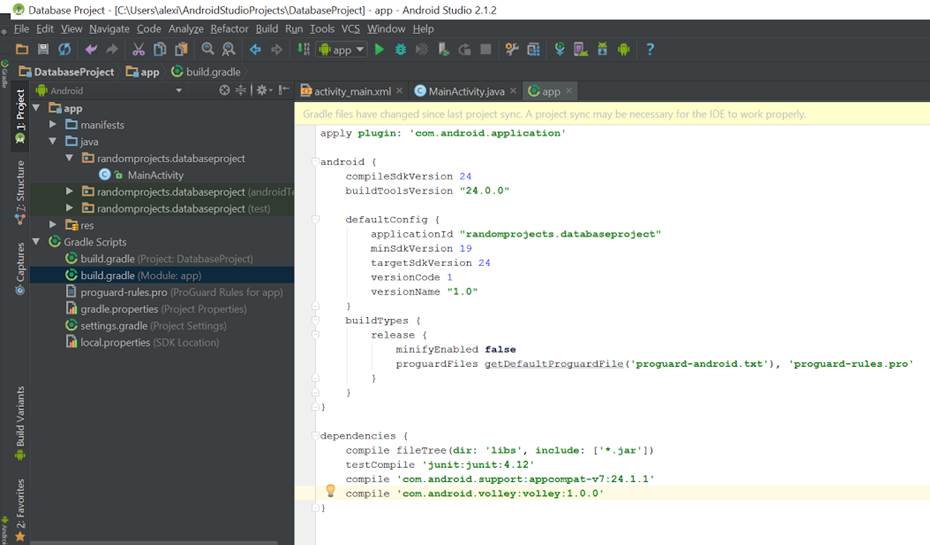
1. Navigate to your Gradle Scripts and find the one with the label build.gradle (Module: app). Then add a compile for ‘com.android.volley:volley:1.0.0’ in your dependencies.
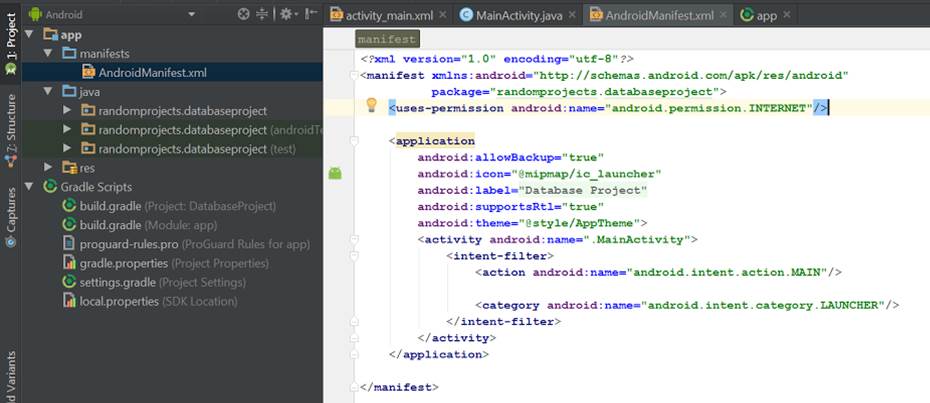
2. Before we do anything else, we should add Internet as a permission required by the app.
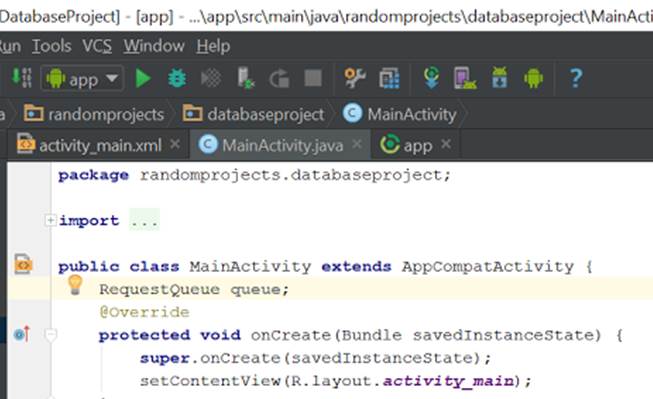
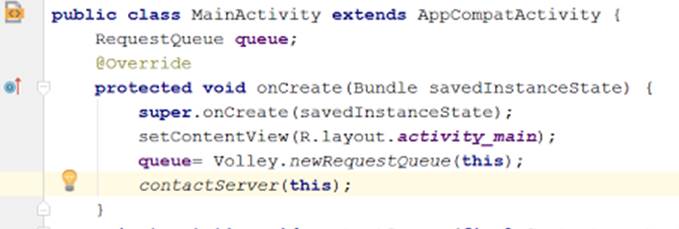
3. In the main activity, make a RequestQueue. The RequestQueue will handle requests to the server.
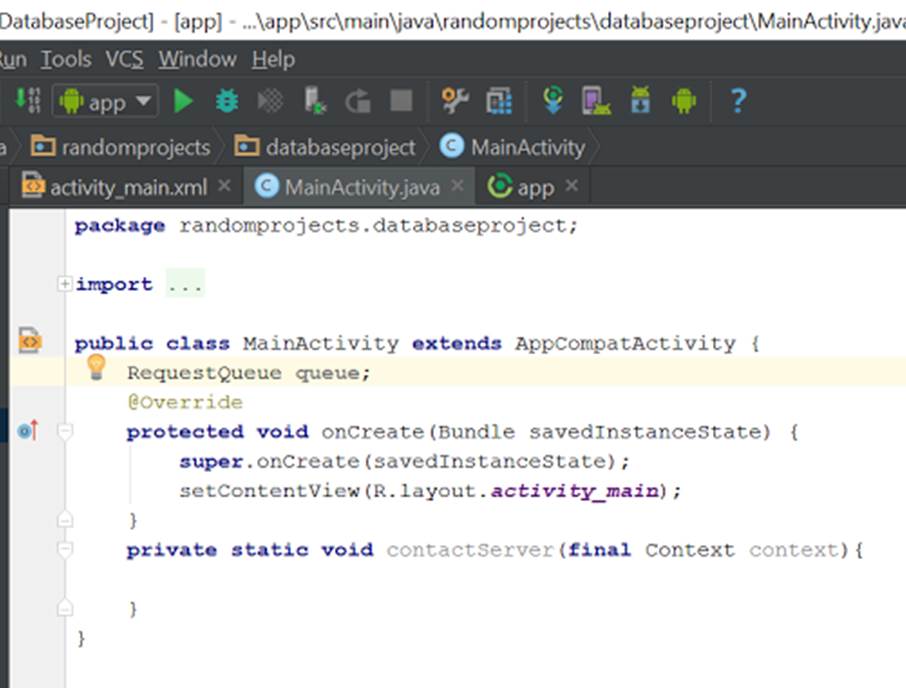
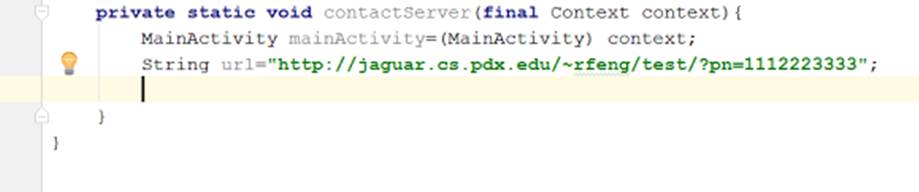
4. Next is creating a method to call to contact the server. We can call it getData(). It will be a static method that will take a final Context.
5. Next is to use the provided context to get the MainActivity. Also, make a String which will be the target url. If the url that I am using is still available at this time, then feel free to use it. Also, if you use it, be sure to thank Ryan Feng for that database.
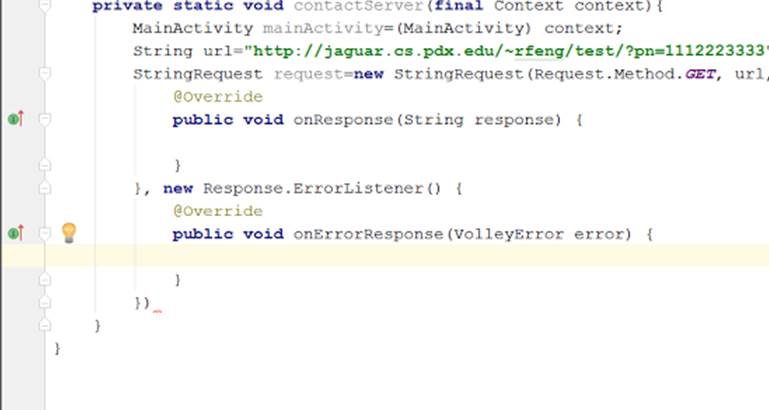
6. Now it is time to make a StringRequest to actually request data from the database. This request will of course return a String, hence the name “StringRequest”.

7. We will be using the first constructor. For the method, type Method and an interface called Method should appear. Then type a period and GET should appear. This will insert Request.Method.GET, so this StringRequest will get data. Then use your url String, and then make a new Listener and it should contain a method called onResponse().

8. Notice that there is an error. The StringRequest requires an ErrorListener as its fourth and final parameter. So let’s add that. It must be between the two circled parentheses. You also must add a comma before adding the ErrorListener to delineate the fact that it is another parameter.
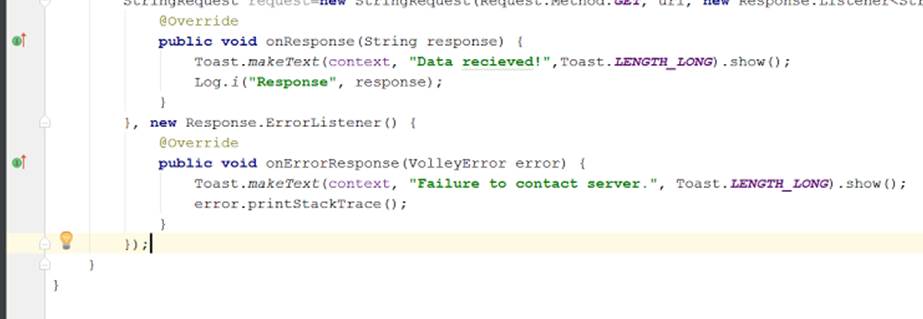
9. Remember to add the semicolon at the end of the parenthesis. Let’s make some Toasts to tell us whether we were successful or unsuccessful in contacting the server, and also print the response to the LogCat.
10. Then we will add the StringRequest to the RequestQueue so that it will execute the StringRequest. Also, we must initialize the RequestQueue.

11. Now we only need to call the method in onCreate and it will give us its response!
If you used the url that was provided, then you should get something similar to:
{"number":"1112223333","location":{"latitude":"30.216440011181","longitude":"39.920156637138"},"time":"Thu Aug 04 11:02:45 "}
This is some strange formatting if you have never seen it before, and it would be a bit annoying to parse through… If you have seen it, you might recognize it as JSON, and the next tutorial will tell you how to parse through this.